
A kitchen is often considered the heart of the home, and there is perhaps no element that defines its personality more than the backsplash. Whether you are looking to increase your home’s resale value or simply want to refresh your cooking space, a DIY kitchen backsplash is one of the most rewarding home improvement projects you can undertake.
Why Choose a DIY Kitchen Backsplash?
Before diving into the “how-to,” it is important to understand the “why.” Why are so many homeowners opting to tackle this project themselves rather than hiring a contractor?
1. Massive Cost Savings
Labor costs for tiling can often exceed the price of the materials themselves. By handling the installation yourself, you can redirect those funds toward higher-quality tiles or other kitchen upgrades, like new hardware or lighting.
2. Creative Control
When you are the lead on the project, you have total control over the pattern, grout color, and layout. You aren’t limited by a contractor’s schedule or their preferred style of working.
3. Skill Building
Tiling is a foundational DIY skill. Once you master a small area like a kitchen backsplash, you will have the confidence to tackle larger projects, such as bathroom walls or floor tiling.
Planning Your Project: The Foundation of Success
The difference between a “DIY-looking” job and a professional-looking one usually lies in the planning phase. Rushing into the purchase of materials without a clear roadmap is a recipe for frustration.
Measuring Your Space
Accuracy is paramount. To calculate how much material you need, follow these steps:
- Measure the Width: Measure the horizontal distance of each wall section in inches.
- Measure the Height: Measure from the countertop to the bottom of the upper cabinets.
- Calculate Square Footage: Multiply the width by the height and divide by 144.
- The “Overage” Rule: Always buy 10% to 15% more material than your calculated square footage. This accounts for broken tiles, mistakes during cutting, and future repairs.
Understanding Your Surface
Most backsplashes are installed over drywall or backer board.
- Drywall: Suitable for most dry kitchen areas if it is in good condition.
- Cement Backer Board: Ideal for areas prone to high moisture or if you are using heavy natural stone tiles.
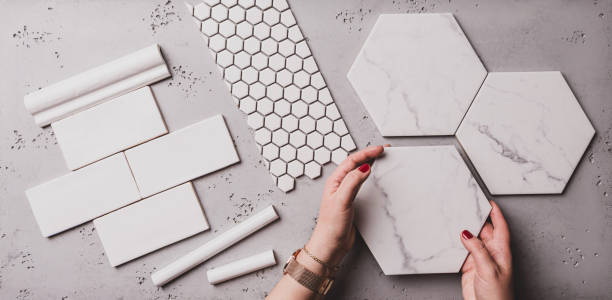
Top Material Options for Your DIY Kitchen Backsplash
Choosing the right material is the most exciting part of the process. Below is a comparison table of popular choices to help you decide which fits your skill level and aesthetic.
Material Comparison Table
| Material Type | Difficulty Level | Durability | Best For |
| Ceramic/Porcelain Tile | Moderate | High | Classic, long-lasting look |
| Peel-and-Stick | Beginner | Low-Moderate | Renters or quick refreshes |
| Glass Tile | Moderate/High | High | Modern, reflective aesthetics |
| Natural Stone | High | Moderate | Rustic or luxury farmhouse styles |
| Beadboard/Wood | Beginner | Low | Traditional or cottage vibes |
Essential Tools and Materials Checklist
To achieve a professional result, you need the right gear. Avoid “making do” with household tools that aren’t designed for masonry.
The “Must-Haves”:
- Wet Saw or Manual Tile Cutter: Necessary for precise cuts around outlets and corners.
- Notched Trowel: Used to apply thin-set or adhesive. The notch size depends on your tile size.
- Rubber Grout Float: For pushing grout into the joints without scratching the tile.
- Large Sponges and Buckets: For the intensive cleaning process during grouting.
- Laser Level or Spirit Level: To ensure your first row is perfectly straight.
- Tile Spacers: Essential for maintaining even gaps between tiles.
Preparing the Workspace
A DIY kitchen backsplash cannot be installed over grease and grime. The bond between the adhesive and the wall must be absolute.
- Clear the Counters: Remove everything. You need an unobstructed workspace.
- Turn Off Power: Safety first. Turn off the electricity to the kitchen outlets at the breaker box.
- Remove Outlet Covers: Take off the faceplates so you can tile right up to the electrical box.
- Degrease the Walls: Use TSP (Trisodium Phosphate) or a strong kitchen degreaser to wipe down the walls. If the wall is glossy, lightly sand it with 120-grit sandpaper to create “tooth” for the adhesive.
- Protect the Countertops: Lay down craft paper or plastic sheeting and tape it securely to the counters to prevent adhesive or grout from scratching your surfaces.
Step-by-Step: The First Row (Setting the Standard)
The most common mistake beginners make is assuming their countertops are perfectly level. They rarely are.
Finding the Center Point
Instead of starting in a corner, find the center of your most visible wall. This ensures that the “cut” tiles at both ends are of equal size, creating a symmetrical, professional appearance.
Using a Ledger Board
If you are tiling an area that doesn’t have a countertop beneath it (like behind a stove), screw a straight piece of scrap wood (a ledger board) into the wall to act as a temporary support for your tiles while the adhesive cures.
Exploring Design Patterns
Your choice of pattern can drastically change the “feel” of the kitchen.
- Running Bond (Brick): The most common for subway tiles. It’s forgiving for beginners and hides slight variations in tile size.
- Stacked Bond: Tiles are aligned vertically and horizontally. This creates a very modern, clean look.
- Herringbone: Very trendy but difficult for a DIY kitchen backsplash due to the complex 45-degree cuts required at the edges.
- Vertical Stack: Great for making low ceilings feel higher.
Mastering the Cut: Handling Corners and Outlets
Once your first row is set and level, you will inevitably encounter the most technical part of a DIY kitchen backsplash: cutting the tile. This is where many beginners feel intimidated, but with the right technique, it becomes a simple process of “measure twice, cut once.”
Using the Right Cutting Tools
Depending on your material, your choice of tool is critical:
- Manual Snap Cutter: Best for ceramic and porcelain subway tiles. It’s quiet, dust-free, and perfect for straight horizontal or vertical cuts.
- Wet Saw: Essential for natural stone, glass, or complex “L-shaped” cuts around electrical outlets. The water prevents the tile from cracking and keeps the blade cool.
- Tile Nippers: Useful for small, irregular snips around pipes or curved edges.
Navigating Electrical Outlets
This is the hallmark of a professional job. Do not simply tile around the outlet cover. Instead:
- Measure the distance from the edge of the last full tile to the start of the electrical box.
- Mark the tile with a pencil or grease pen.
- Cut the tile so that it sits inside the footprint of the outlet faceplate but outside the electrical box itself.
- Pro Tip: You may need “box extenders” to bring the outlet flush with your new tile surface once the project is finished.
Adhesives: Mastic vs. Thin-set
Choosing the right “glue” for your DIY kitchen backsplash depends on your environment and tile type.
1. Type 1 Mastic
Mastic is a pre-mixed adhesive that is incredibly popular for DIYers.
- Pros: Easy to use, no mixing required, and has great “grab” (tiles won’t slide down the wall).
- Cons: Not suitable for high-moisture areas (like walk-in showers) or very heavy, large-format stone.
- Best For: Standard ceramic subway tiles in a typical kitchen.
2. Thin-set Mortar
This is a powder that you mix with water.
- Pros: Incredible bond strength and heat resistance (ideal for behind the stove). It is the professional standard.
- Cons: Messy to mix and has a limited “pot life” (it hardens in the bucket if you work too slowly).
- Best For: Glass tiles (use white thin-set), heavy stone, and areas near high-heat cooktops.
The Art of Grouting: Bringing it All Together
Grouting is the transformative step where your individual tiles become a unified, waterproof surface. However, timing is everything. You must wait at least 24 hours for your adhesive to fully cure before applying grout.
Choosing Your Grout Type
- Sanded Grout: Contains fine sand which acts as a filler. Use this for grout lines larger than 1/8 inch. It is stronger but can scratch delicate glass or polished stone.
- Unsanded Grout: Smoother and stickier. Use this for thin grout lines (1/16 to 1/8 inch) and for polished tiles that scratch easily.
- Epoxy Grout: Highly resistant to stains and chemicals. It is difficult to apply for beginners but is the best choice for long-term maintenance in a busy kitchen.
The Grouting Process
- Mix the Grout: Aim for a “peanut butter” consistency. Let it “slake” (sit) for 10 minutes, then stir again.
- Apply at an Angle: Use your rubber float at a 45-degree angle to the wall. Push the grout firmly into the joints.
- Remove Excess: Use the edge of the float to scrape off as much excess grout as possible from the tile surface.
- The First Wash: After about 15–20 minutes, the grout will begin to feel firm. Use a damp (not dripping) sponge to gently wipe the tile in a circular motion.
- The Haze Wash: After another 30 minutes, a cloudy haze will appear. Use a microfiber cloth or a clean, lightly damp sponge to buff the tiles to a shine.
Finishing Touches: Caulk and Seal
A DIY kitchen backsplash isn’t finished until the “wet” joints are sealed.
Caulking the Expansion Gap
Never grout the joint where the backsplash meets the countertop. Houses shift and settle; grout in this corner will inevitably crack. Instead, use a 100% silicone caulk that matches your grout color. This flexible seal allows for movement and prevents water from seeping behind your cabinets.
Sealing the Tile and Grout
If you used natural stone (like marble or travertine) or a standard cement-based grout, you must apply a sealer.
- Why? Grout is porous. Without sealer, that spilled spaghetti sauce will leave a permanent stain.
- How? Apply a high-quality penetrating sealer with a soft cloth or sponge once the grout has cured for at least 48 to 72 hours.
Troubleshooting Common DIY Mistakes
Even with a guide, challenges happen. Here is how to fix them:
- Uneven Tiles (Lippage): If one tile sticks out further than the one next to it, you likely applied too much adhesive. Remove the tile immediately, scrape the wall clean, and try again with less pressure.
- Grout is Cracking: This usually happens if the grout was mixed with too much water or if the house settled. Dig out the loose grout and re-apply a fresh, thicker batch.
- Tiles are Sliding: If your tiles are “sagging” down the wall, your adhesive is too thin or you are using tiles that are too heavy for mastic. Use spacers at the bottom to hold the weight until the adhesive sets.
Specialized Section: Popular DIY Backsplash Styles & Trends
Choosing the style for your DIY kitchen backsplash is where you can truly express your home’s personality. While subway tile remains a timeless favorite, several other trends are gaining traction due to their ease of installation and high visual impact.
1. The Modern Farmhouse (Brick Veneer)
Thin brick veneers offer the rustic, industrial look of a real brick wall without the weight or structural requirements.
- Installation Tip: Use a “thick-set” mortar and consider a “German Smear” technique (thinning out mortar over the brick) for an aged, whitewashed appearance.
- Maintenance: Always use a matte sealer, as brick is highly porous and will absorb cooking grease.
2. The Sleek Look: Large Format Tiles
Large format tiles (anything larger than 12×12 inches) are becoming a top choice for those wanting to minimize grout lines.
- Installation Challenge: The wall must be perfectly flat. Any “bowing” in the drywall will cause the edges of these large tiles to stick out (lippage).
- Benefit: Fewer grout lines mean less scrubbing and a more seamless, stone-slab appearance.
3. Hexagon and Geometric Patterns
Moving away from rectangles, hexagon tiles provide a playful, honeycomb effect.
- DIY Hack: Many hexagons come on mesh-mounted sheets. This makes spacing much easier than individual tiles, though you will still need to be precise with your edge cuts.
Cost Breakdown: Budgeting for Your DIY Project
To maintain transparency and help you plan, let’s look at a typical budget for a 30-square-foot kitchen backsplash area.
Estimated Costs (30 sq. ft. Area)
| Expense Item | Estimated Cost (Low End) | Estimated Cost (High End) |
| Tile Materials | $60 (Ceramic) | $450 (High-end Marble) |
| Adhesive/Mastic | $25 | $50 |
| Grout | $15 | $40 |
| Tools (New) | $50 (Manual) | $150 (Wet Saw Rental) |
| Spacers & Caulk | $20 | $30 |
| Total | $170 | $720 |
Note: Hiring a professional for this same project would typically add $400 to $800 in labor costs, nearly doubling or tripling your total investment.
The “Peel-and-Stick” Revolution: A Beginner’s Alternative
If the idea of wet saws and mortar feels too daunting, or if you are a renter, peel-and-stick options have improved significantly in quality.
- Vinyl Tiles: These are thin, flexible, and can be cut with standard utility scissors. They are excellent for budget refreshes but lack the 3D depth of real tile.
- Metal/Glass Hybrid Stickers: These often feature a thin layer of real aluminum or glass over an adhesive backing. They look remarkably real but require a very smooth wall surface to stay adhered.
- The Downside: Peel-and-stick backsplashes generally have a shorter lifespan (3-5 years) and can be difficult to remove without damaging the underlying drywall.
Advanced Technique: Tiling Behind the Stove
The area behind the range is the focal point of the kitchen. Many DIYers choose to create a “feature box” here.
- Change the Pattern: If you are doing a horizontal brick pattern elsewhere, consider a herringbone or vertical stack specifically in the space between the stove and the hood.
- Bordering: Use “pencil tiles” or “bullnose” edges to create a frame around the feature area.
- Heat Considerations: Ensure you are using a heat-rated thin-set rather than mastic in this area, as the high temperatures from the oven can cause mastic to soften over time.
How to Clean and Maintain Your New Backsplash
Your DIY kitchen backsplash is an investment. Keeping it looking “just installed” requires a few specific habits:
- Daily: Wipe down splashes immediately. Acidic foods like tomato sauce or lemon juice can etch natural stone if left too long.
- Weekly: Use a pH-neutral cleaner. Avoid harsh bleach or ammonia, as these can break down your grout sealer over time.
- Annually: Perform a “water test” on your grout. Drop a few beads of water on the grout line; if they soak in, it’s time to re-apply a sealer.
Environmental and Sustainability Considerations
In today’s home improvement landscape, expertise isn’t just about how to build—it’s about building responsibly. When planning your DIY kitchen backsplash, you can make choices that benefit both your home and the environment.
Eco-Friendly Material Choices
- Recycled Glass Tiles: Many manufacturers now offer stunning tiles made from 100% post-consumer recycled glass. These are non-porous, meaning they don’t require chemical sealers.
- Reclaimed Wood: For a rustic look, using salvaged wood (sealed properly with low-VOC finishes) adds a story to your kitchen.
- Locally Sourced Stone: Reducing the “mileage” of your materials lowers the carbon footprint of your renovation.
Health and Air Quality (VOCs)
When selecting your adhesives and sealers, look for products labeled “Low-VOC” (Volatile Organic Compounds). Standard construction adhesives can off-gas chemicals for weeks. Using water-based sealers and low-emission mortars ensures your kitchen remains a healthy environment for food preparation.
Pro-Level Detailing: Handling Edges and Transitions
The mark of a true guest-posting expert and professional contractor is how the tile ends. You don’t want to see the “raw,” unglazed edge of a tile.
1. Bullnose Tiles
These tiles have one rounded, finished edge. They are designed specifically to transition from the tiled area back to the drywall.
2. Schluter Strips (Metal Edges)
For a modern, clean finish, many DIYers use L-shaped metal or plastic strips called “Schluter” profiles.
- How to install: You embed the flat part of the strip into the thin-set behind the last row of tiles. This creates a sleek, metallic border that protects the tile edges from chipping.
3. Caulk-to-Paint Transition
If you choose not to use a border, ensure your paint line is crisp. Use painter’s tape to create a clean line for your silicone caulk where the tile meets the wall.
Frequently Asked Questions (FAQs)
Can I tile over my existing backsplash?
Yes, but only if the existing surface is perfectly flat and secure. You must scuff the old tile with a grinder to ensure the new adhesive can “bite” into the surface. However, removing the old material is always the “Best Practice” recommendation.
How long does a DIY kitchen backsplash take?
For a standard kitchen, expect a 3-day timeline:
- Day 1: Prep and Tile installation.
- Day 2: Grouting and cleaning.
- Day 3: Caulking, sealing, and reinstalling outlet covers.
What is the easiest backsplash for a beginner?
Peel-and-stick vinyl or large-format ceramic subway tiles are the most beginner-friendly due to the reduced number of cuts and ease of alignment.
Conclusion
A DIY kitchen backsplash is more than just a wall covering; it is a testament to your craftsmanship and a functional upgrade that protects your home. By taking the time to plan your layout, choosing the right adhesive for your climate, and mastering the art of the grout float, you have transformed your kitchen into a professional-grade space.
Whether you’re blogging about your journey or simply enjoying the new view while you cook, you now have the expertise to tackle the next room in your house.